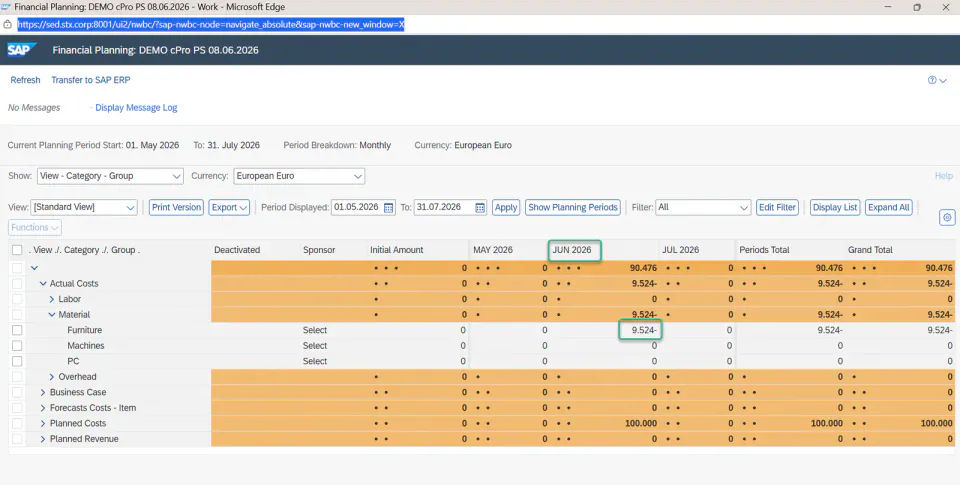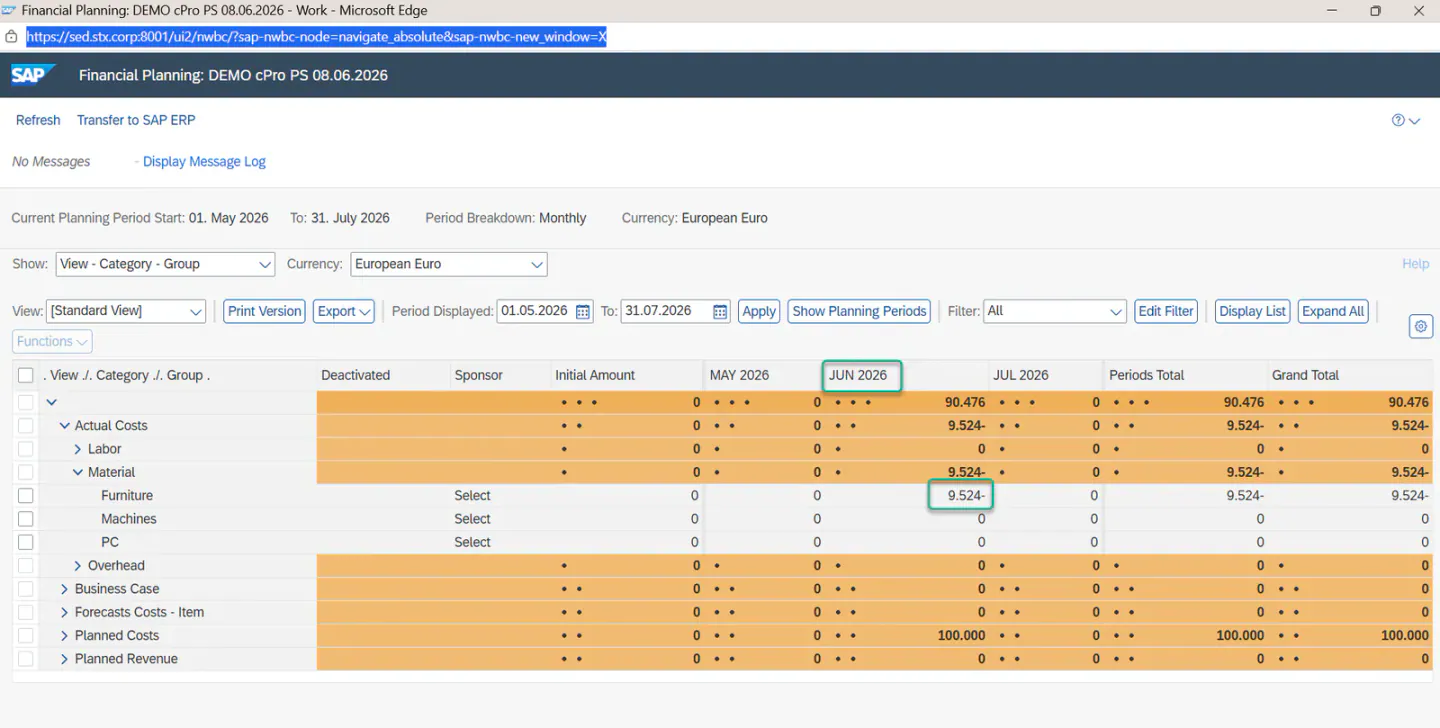

Financial Planning: Post actuals for project expenses and reflect in PPM Item actuals (Item -> cProject -> PS Project)
Solution
Customize PS Project Creation in SPRO
Scenario: Create cProject and PS project automatically
- Go to transaction code
SPROand navigate to the IMG pathSAP Portfolio and Project Management → Portfolio Management → Global Customizing → Portfolio-Independent Settings → Define Portfolio Item Typesand create a new item type withPortfolio and Project Managementas the link to Project System.


-
Maintain its decision points as required.
-
Define the item status and its subsequent statuses for this item type.
-
Create a project type under
SAP Portfolio and Project Management → Project Management → Structure → Define Project Types. -
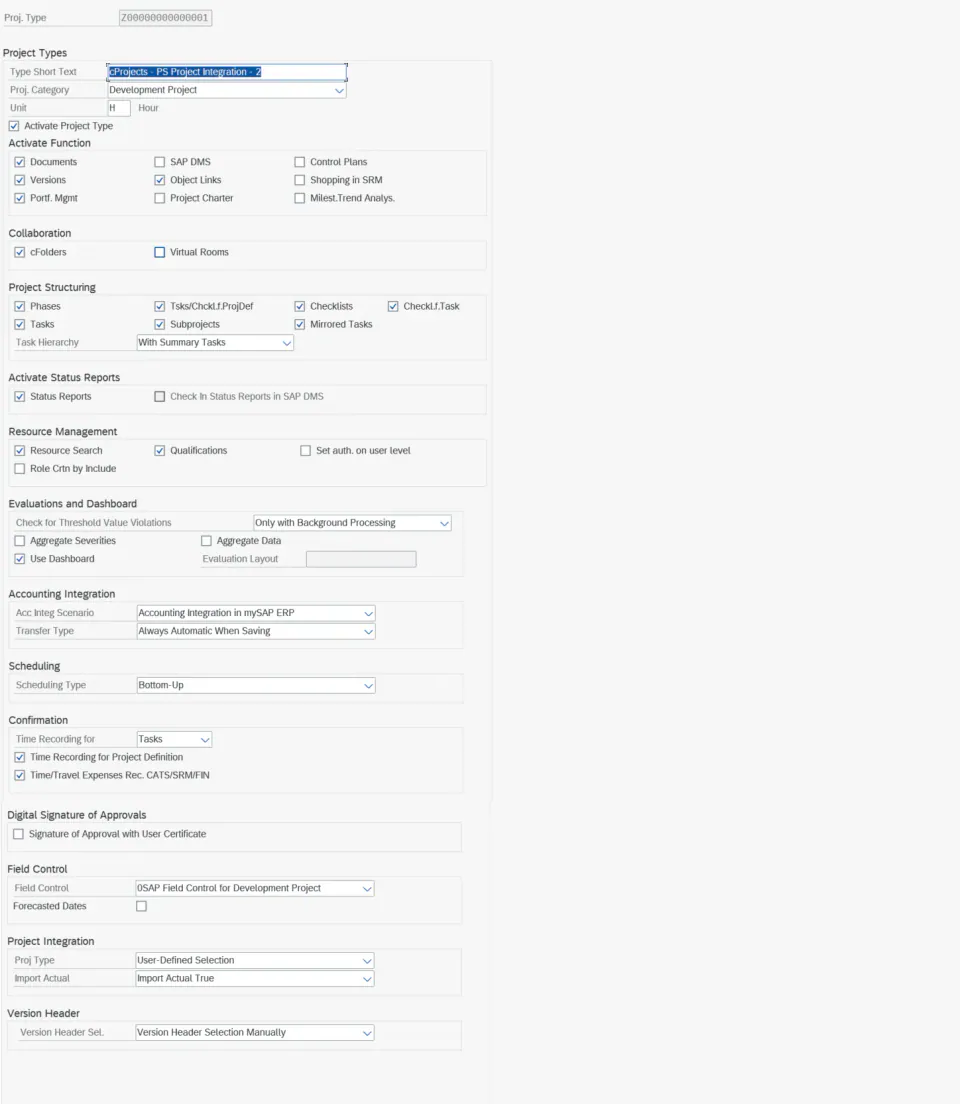
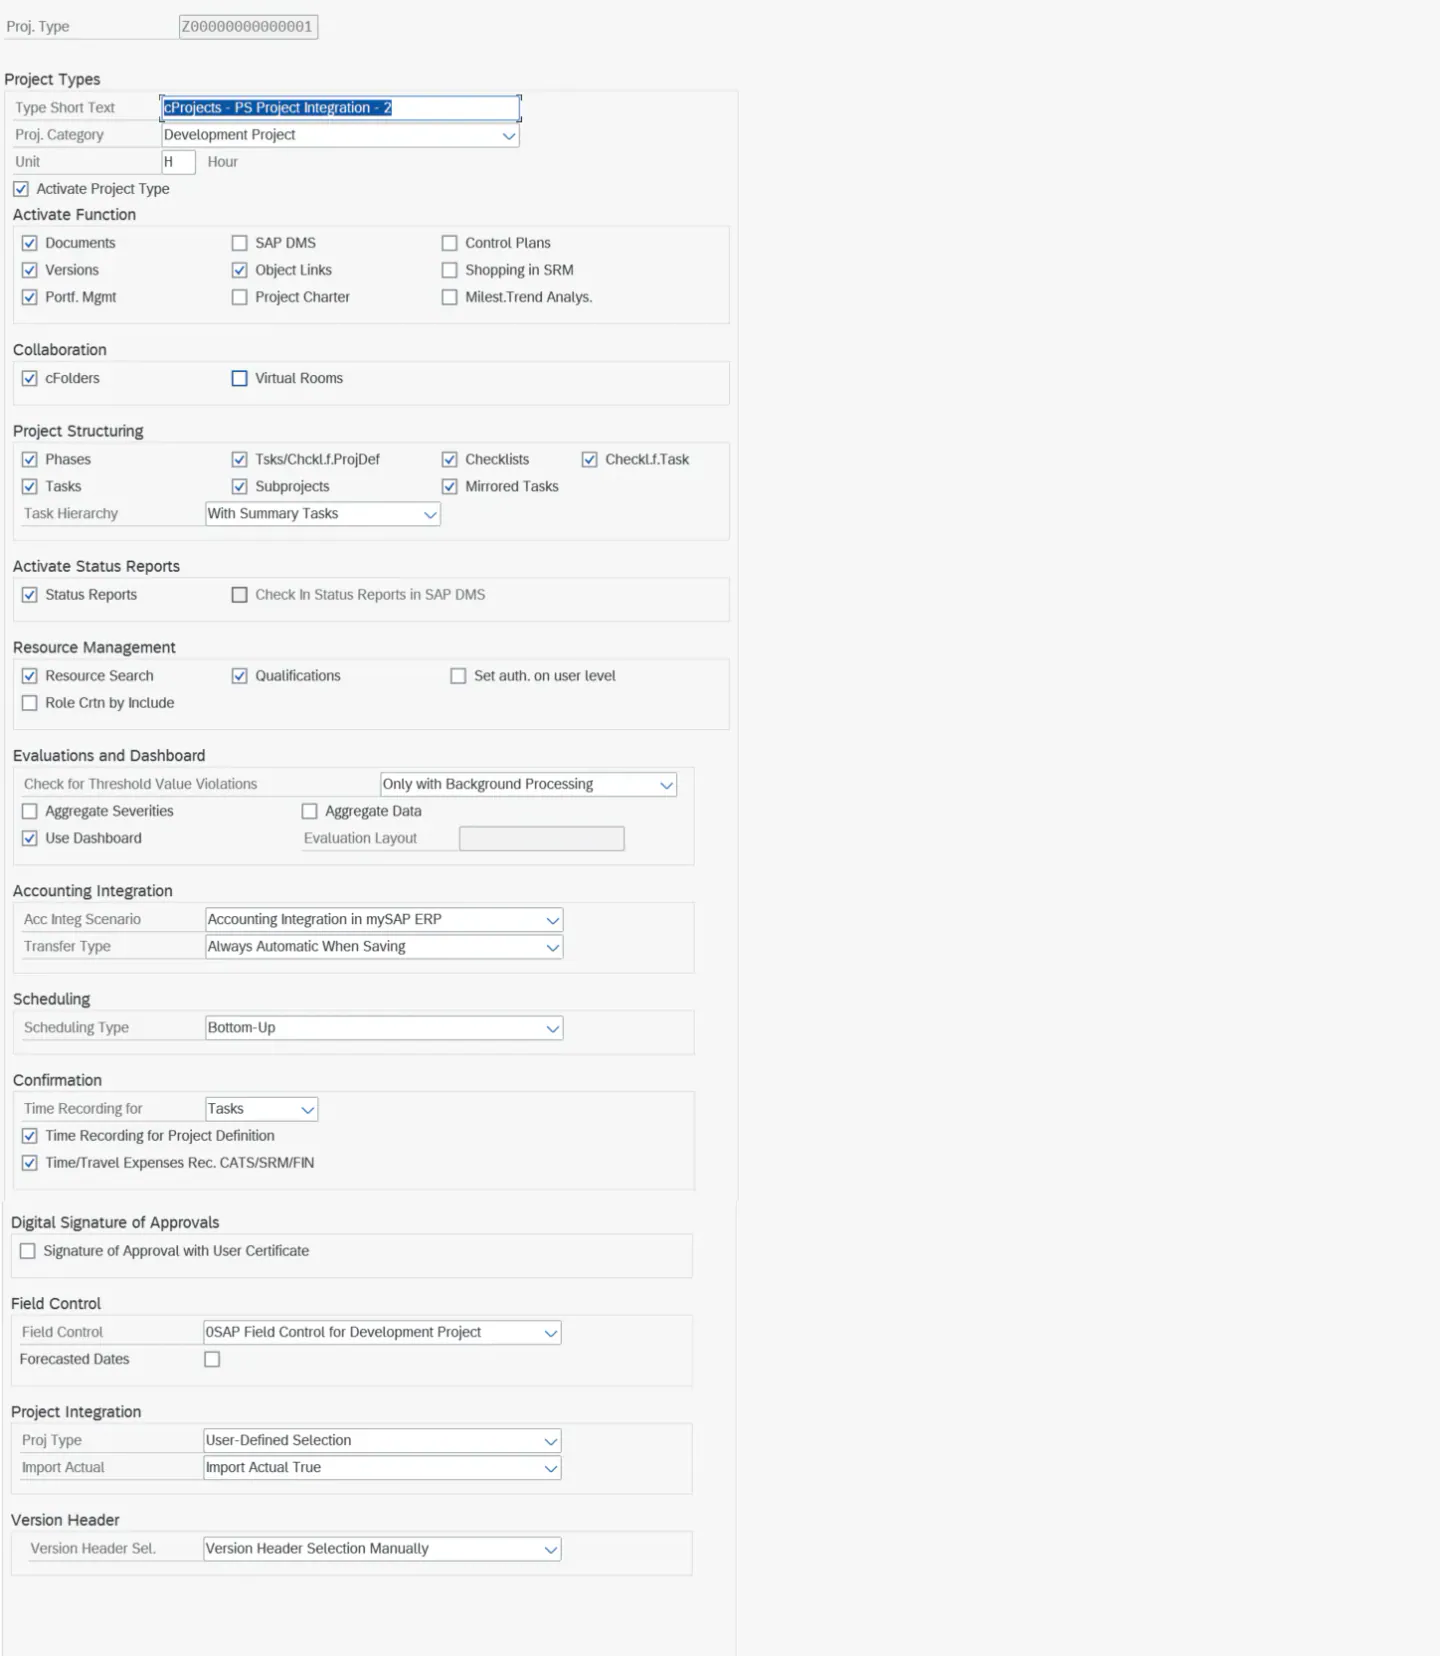
Configure it to match your business requirements (see the example below).
-
For the automatic creation of a PS project from Project Management in PPM, the key setting is "Accounting Integration". In this section, "Acc Integ Scenario" must be set to "Accounting Integration in mySAP ERP", and the Transfer Type must be set to one of the three options below.
- If "Always Automatic When Saving" is selected, the PS project is created automatically when the cProject is created.
- If "Automatic As of 'Flagged for Transfer / To Assign'" is selected, you then set the "Flag for Transfer" status on the cProject to trigger automatic PS project creation.
- If "Automatic As of Release of Project" is selected, the PS project is created automatically once the cProject status is set to Released.
-
Create a project template based on the project type defined above and assign it to the item type under
SAP Portfolio and Project Management → Portfolio Management → Global Customizing → Portfolio-Independent Settings → Map Item Type to Project or PS. Also assign the RPM item decision points to the template phase.
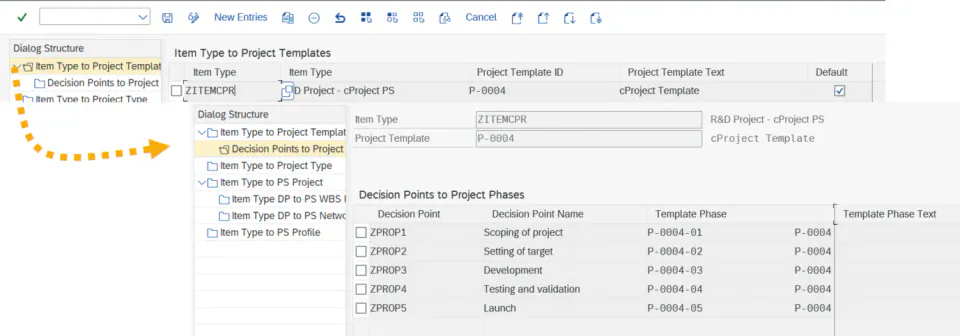
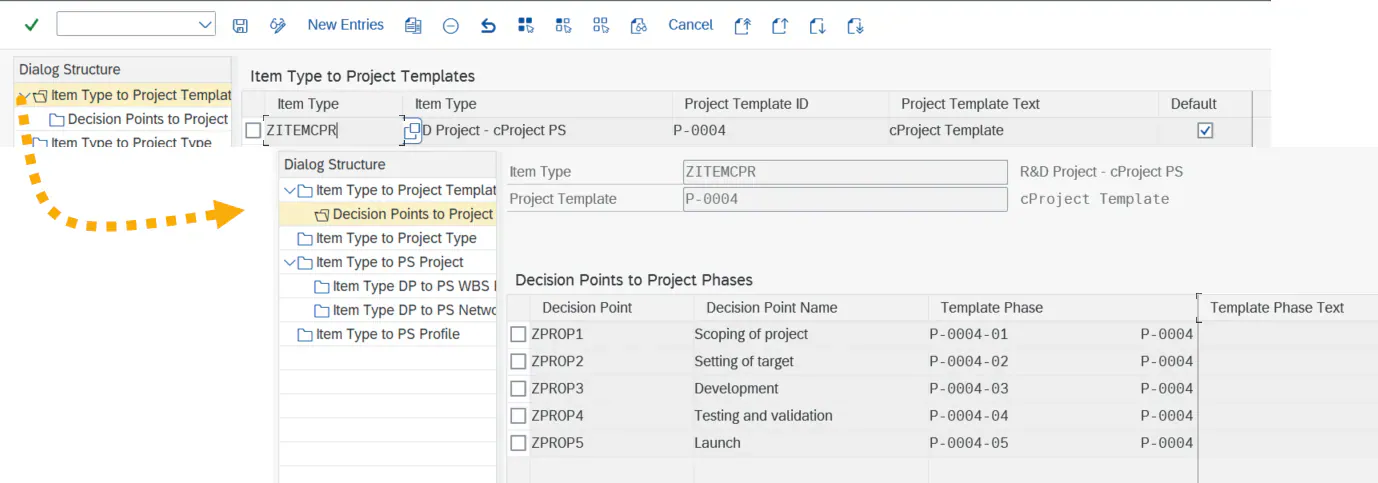
- Set up the accounting integration: navigate to
SAP Portfolio and Project Management → Project Management → Connection to External Systems → Accounting Integration → Activate Integrationand activate the scenario.

- Define the object links for accounting integration: navigate to
SAP Portfolio and Project Management → Project Management → Connection to External Systems → Accounting Integration → Define Object Links for Accounting Integrationand define the destination and web server.
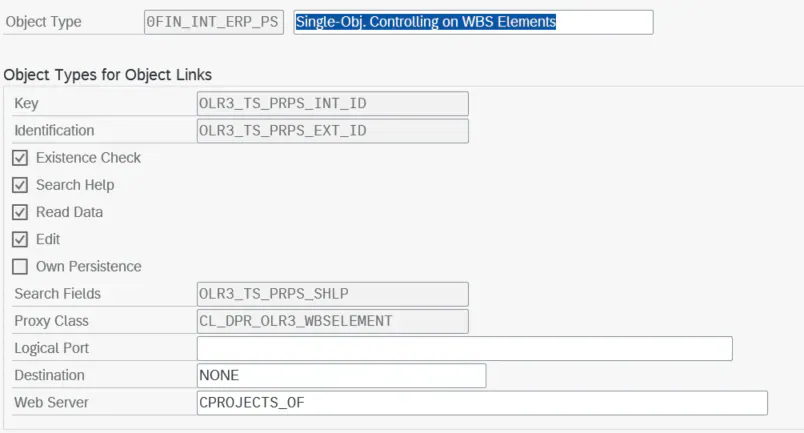
- Set up the general settings: navigate to
SAP Portfolio and Project Management → Project Management → Connection to External Systems → Accounting Integration → Make General Settings.


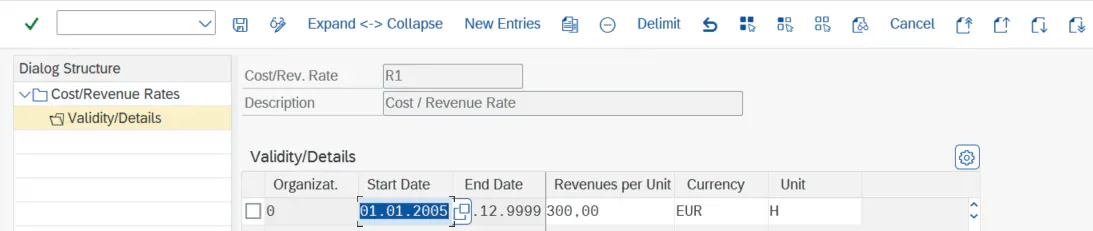
- Define the cost/revenue rates: navigate to
SAP Portfolio and Project Management → Project Management → Connection to External Systems → Accounting Integration → Define Cost/Revenue Rates.
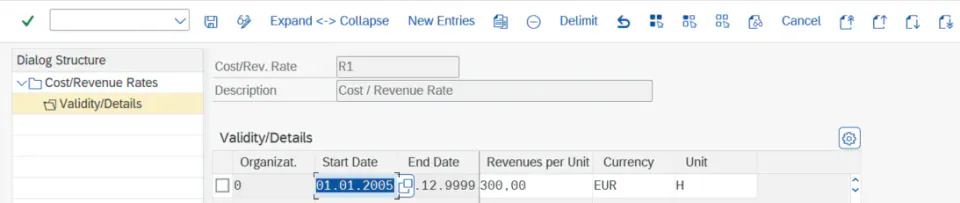
-
Optional. These steps are only required when PPM and ERP run on separate systems. If they share the same system, skip this section.
- Go to
SAP Portfolio and Project Management → Project Management → Connection to External Systems → Accounting Integration → Replicate Cost/Revenue Rates, enter the ERP destination, and run the report with test mode deactivated. This replicates the cost/revenue rates defined in the PPM system to the ERP system. - Go to
SAP Portfolio and Project Management → Project Management → Connection to External Systems → Accounting Integration → Replicate Accounting-Relevant Characteristicsand enter the ERP destination. Then run the report with both Project Type and Reason for Project selected. This replicates the Project Type and Reason for Project defined in the PPM system to the ERP system.
- Go to
-
Define the settings in the ERP system: navigate to
SAP Portfolio and Project Management → Project Management → Connection to External Systems → Accounting Integration → Make Settings in ERP System, enter the destination, and choose Execute. If PPM and ERP are the same system, no destination exists — enter NONE. After executing, you are taken to another configuration node for Collaboration Projects Controlling Integration.- Go to
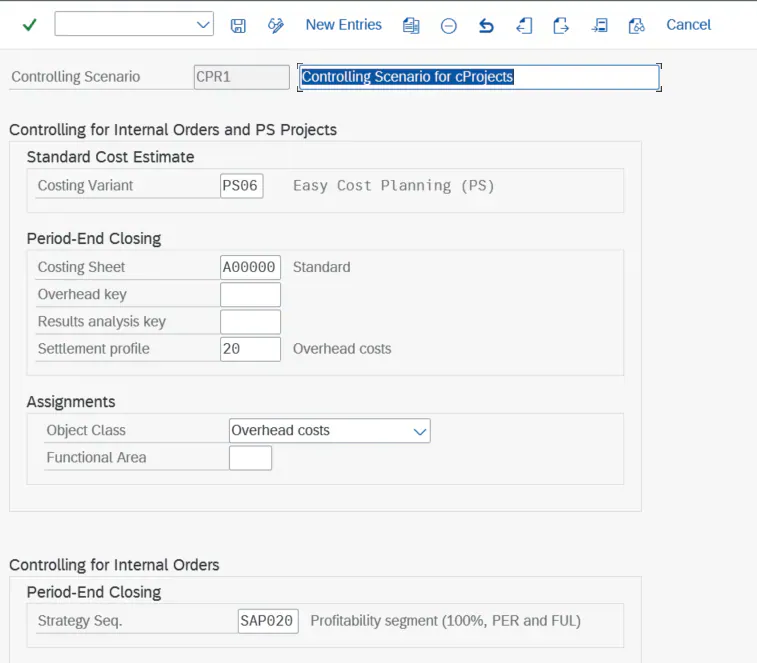
Collaboration Projects → Controlling → Create and Change Controlling Scenarioand maintain the settings as shown below.
- Go to
- Go to
Collaboration Projects → Controlling → Define Controlling Scenarioand maintain the settings as shown below.

-
Note: In the screenshot above, the controlling level indicates the maximum WBS level that is created in the PS project from the cProject. For example, if your cProject has tasks and sub-tasks down to level 4 but you select 2 as the controlling level, the PS project is created with its lowest WBS level set to 2.
-
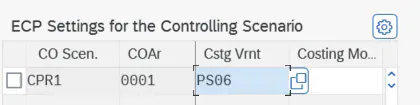
Go to
Collaboration Projects → Controlling → Settings for Easy Cost Planningand maintain the entry as shown below: define your controlling scenario and controlling area, and set the costing variant to PS06 (the default).
- Go to
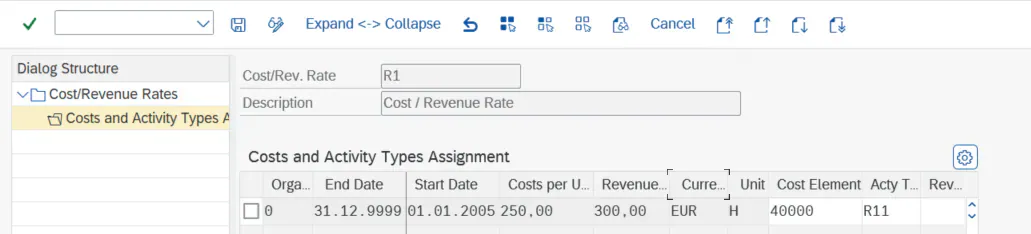
Collaboration Projects → Controlling → Assign Cost Elements and Activity Typesand enter the details below: the cost element, activity type, and revenue element (if applicable).
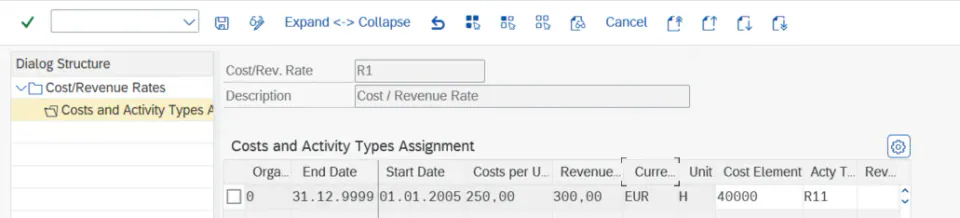
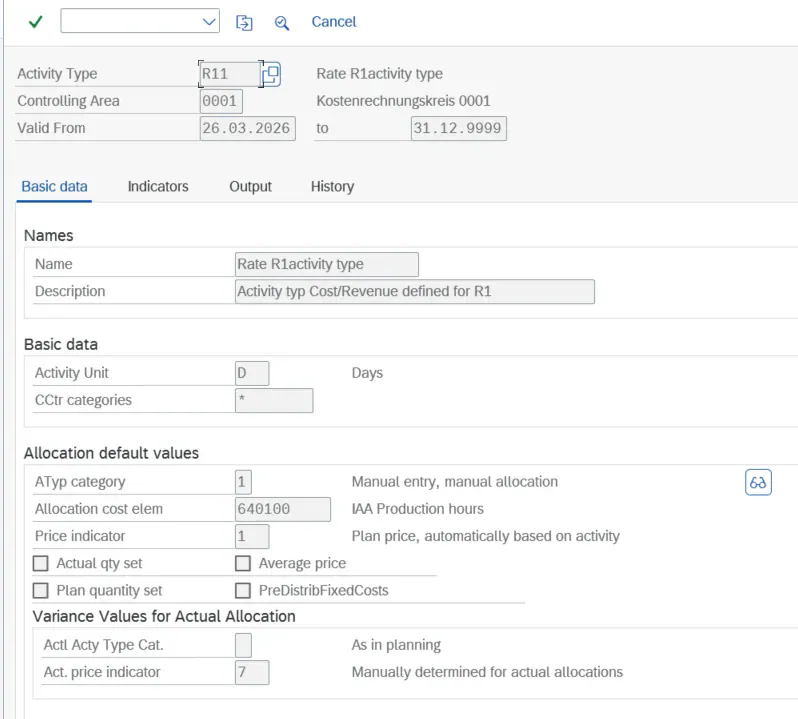
- To create an activity type, use transaction
KL03and create it under your defined controlling area.
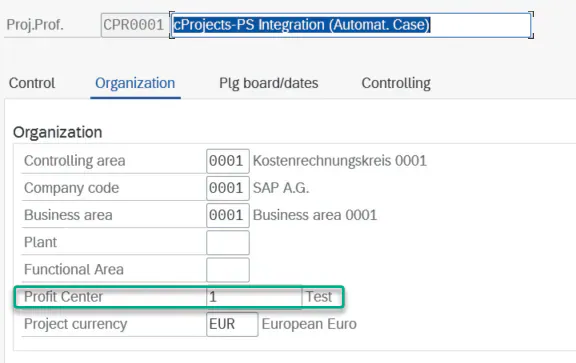
- You must also maintain a profit center for the master data in the ERP system — without it, the WBS element cannot be created. Go to transaction
SPROand navigate to the following path in the ERP system:Project Systems → Structures → Operative Structures → Work Breakdown Structure (WBS) → Create Project Profile. Then open the Organization tab for the default project profileCPR0001and maintain the profit center value there.
- Maintain the DFM common functions scenarios: navigate to
SAP Portfolio and Project Management → Common Functions → Decision Flow Management Settings → Attribute Synchronization → Maintain Attributes for Synchronization Scenariosand define the scenarios below.


- Maintain the field mappings: navigate to
SAP Portfolio and Project Management → Common Functions → Decision Flow Management Settings → Attribute Synchronization → Maintain Field Mappingsand define the fields to be mapped as shown below.


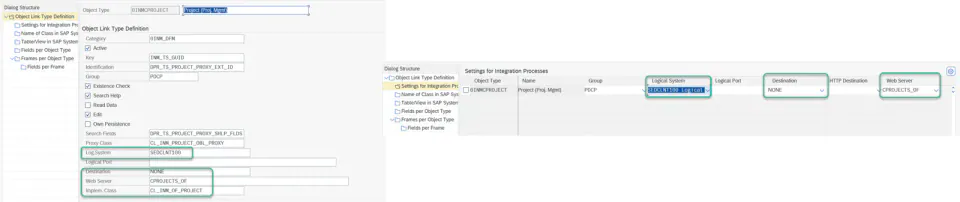
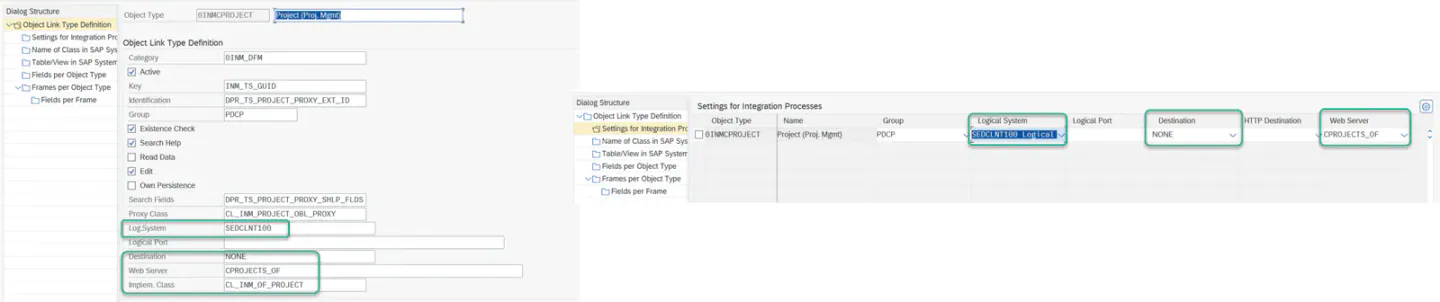
- Define the DFM object link types: navigate to
SAP Portfolio and Project Management → Common Functions → Decision Flow Management Settings → Define DFM Object Link Typesand define the logical system, destination, and web server. Similarly, you can update all other relevant object types, such as Phase (Proj. Mgmt) and Task (Proj. Mgmt).
- Now create an item using the item type defined above.
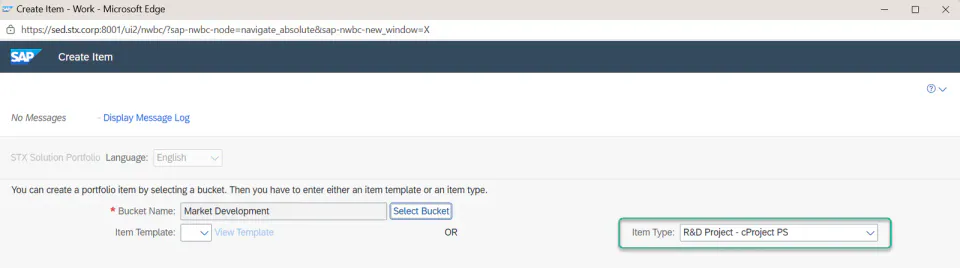
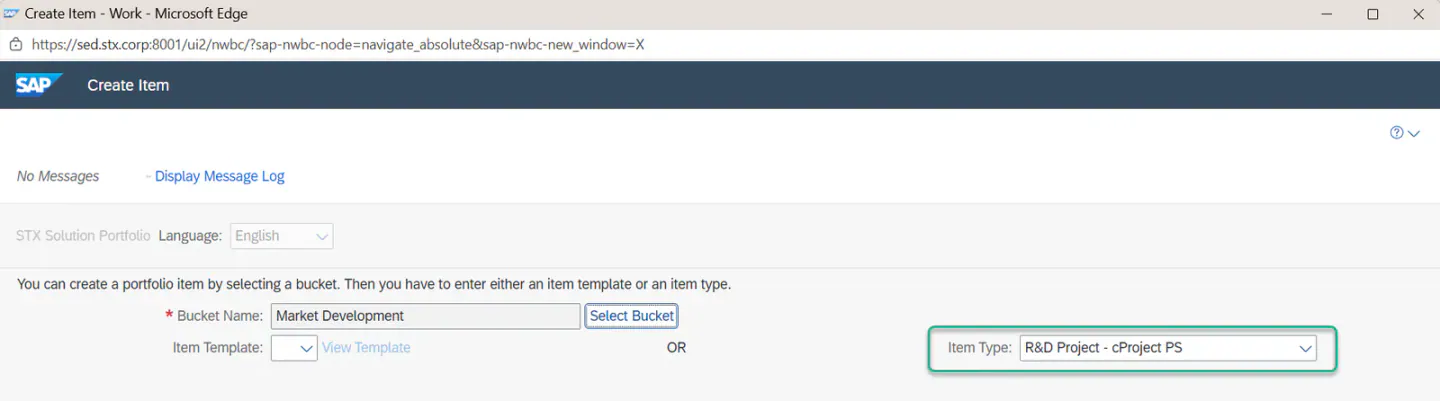
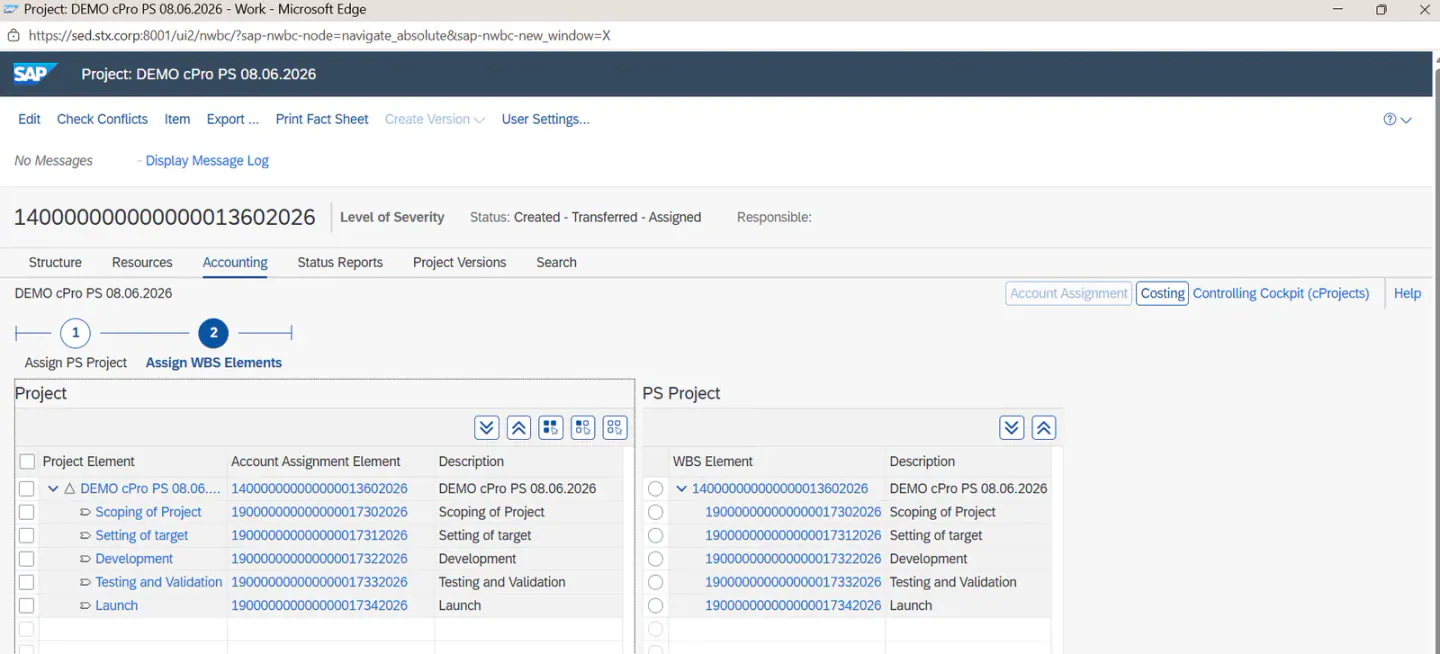
- Once the item is created, the cProject and PS project are generated automatically, and the cProject is linked to the item (see below).
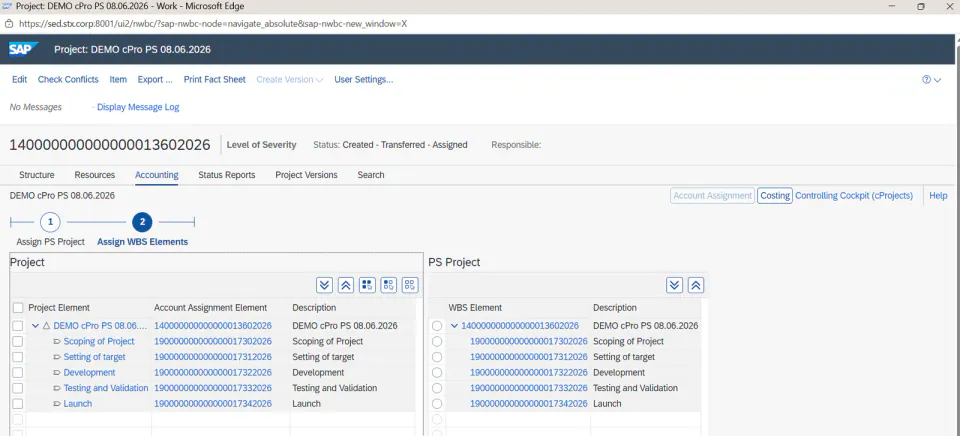
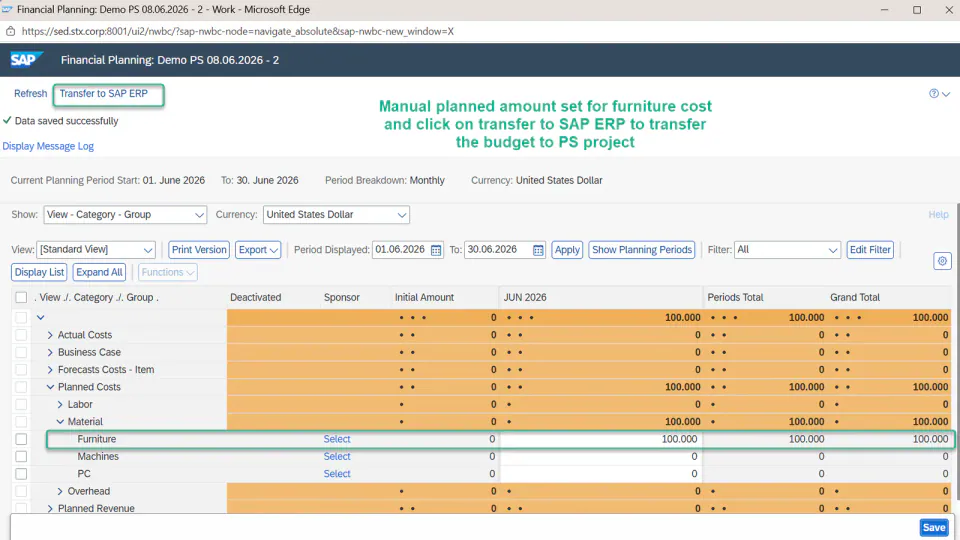
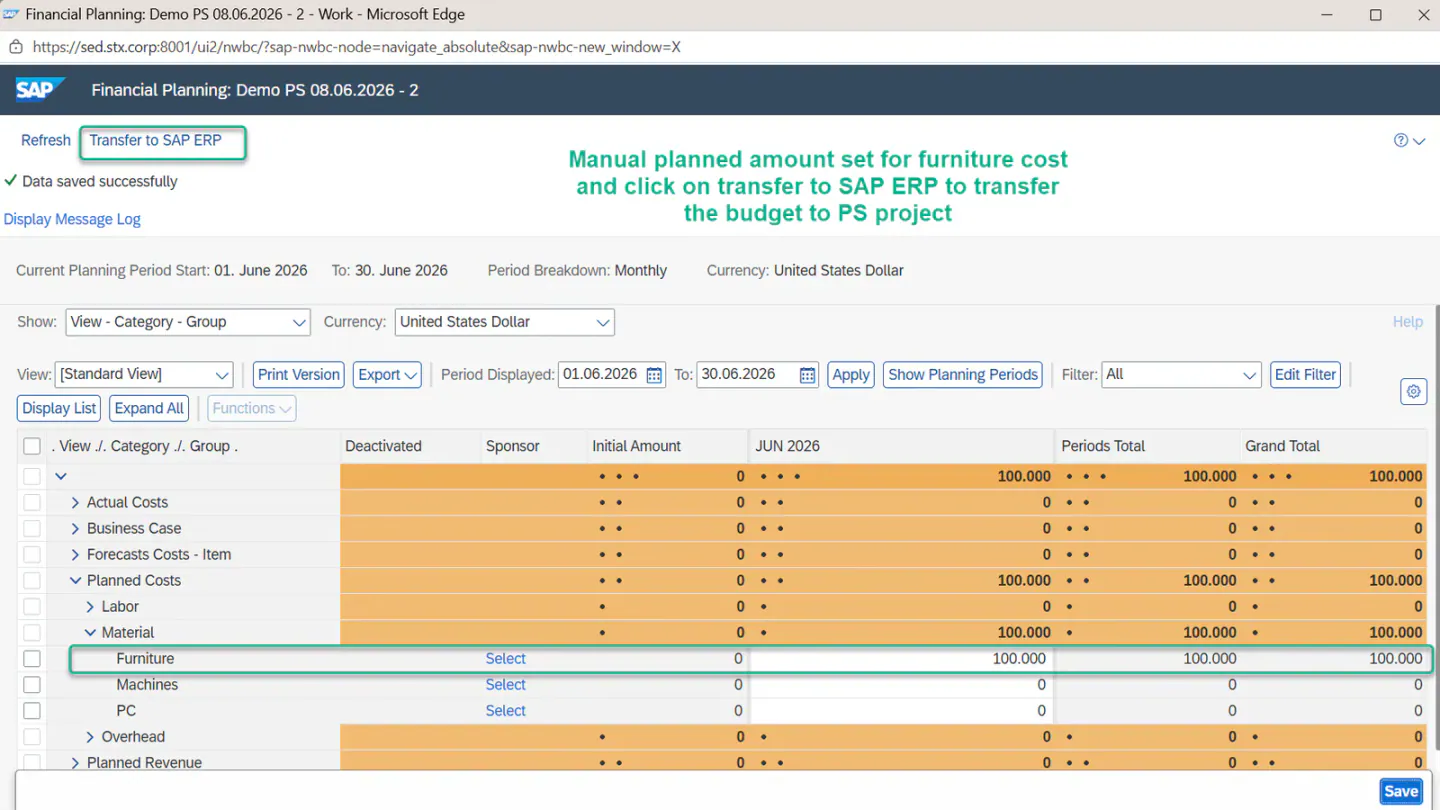
- You can now allocate the planned budget manually through financial planning.
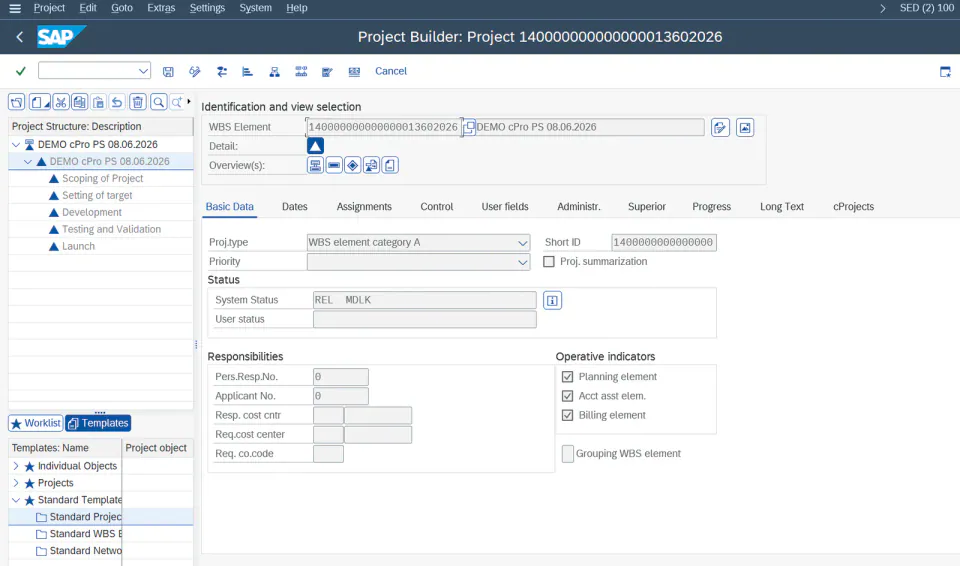
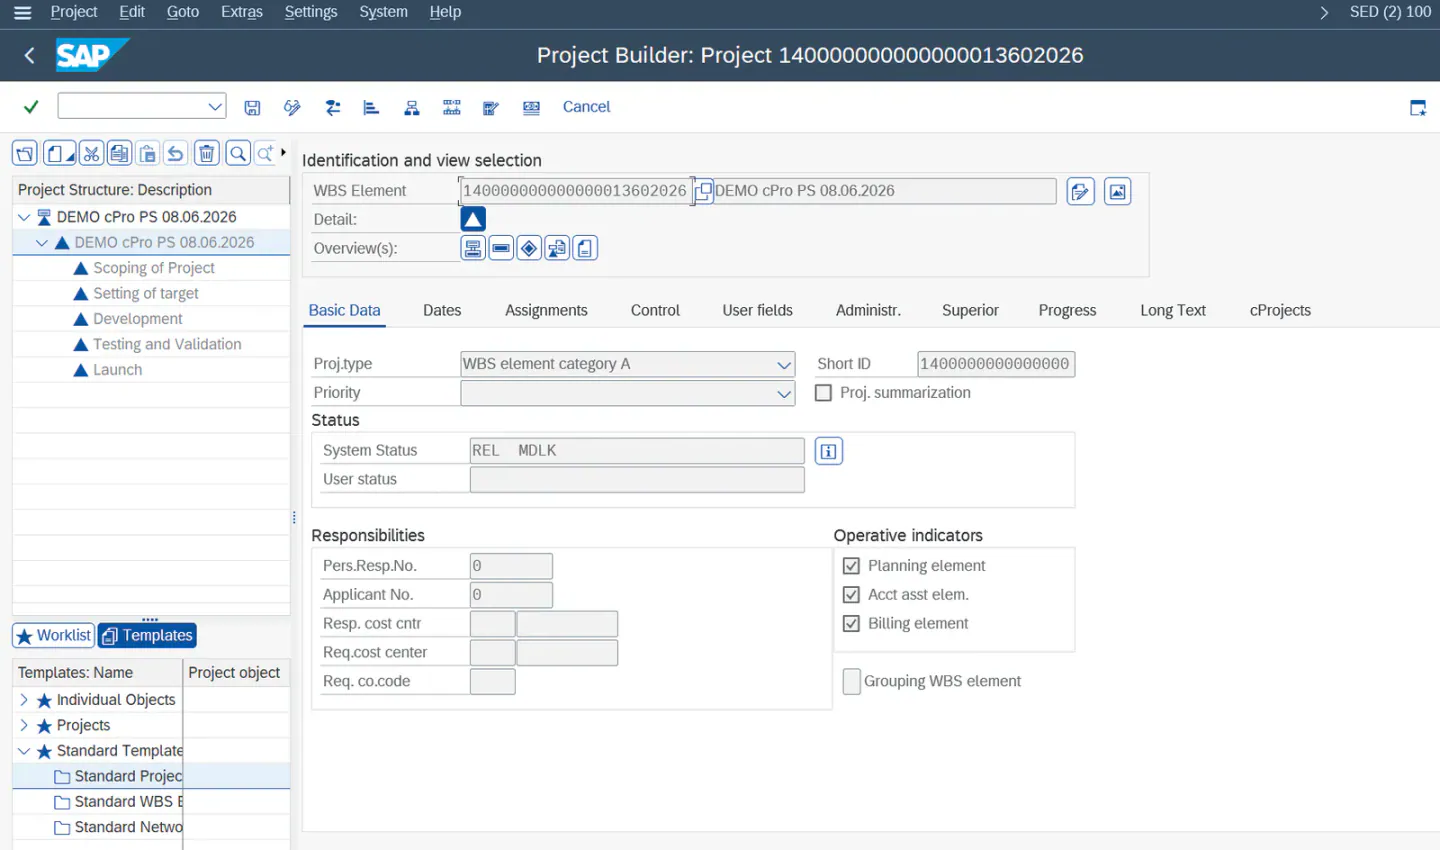
- The PS project now shows the status
REL MDLK: it is released automatically and ready for posting actuals.
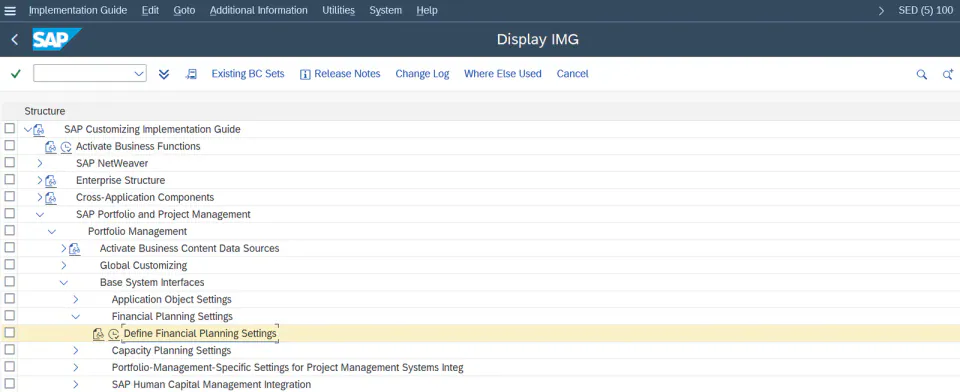
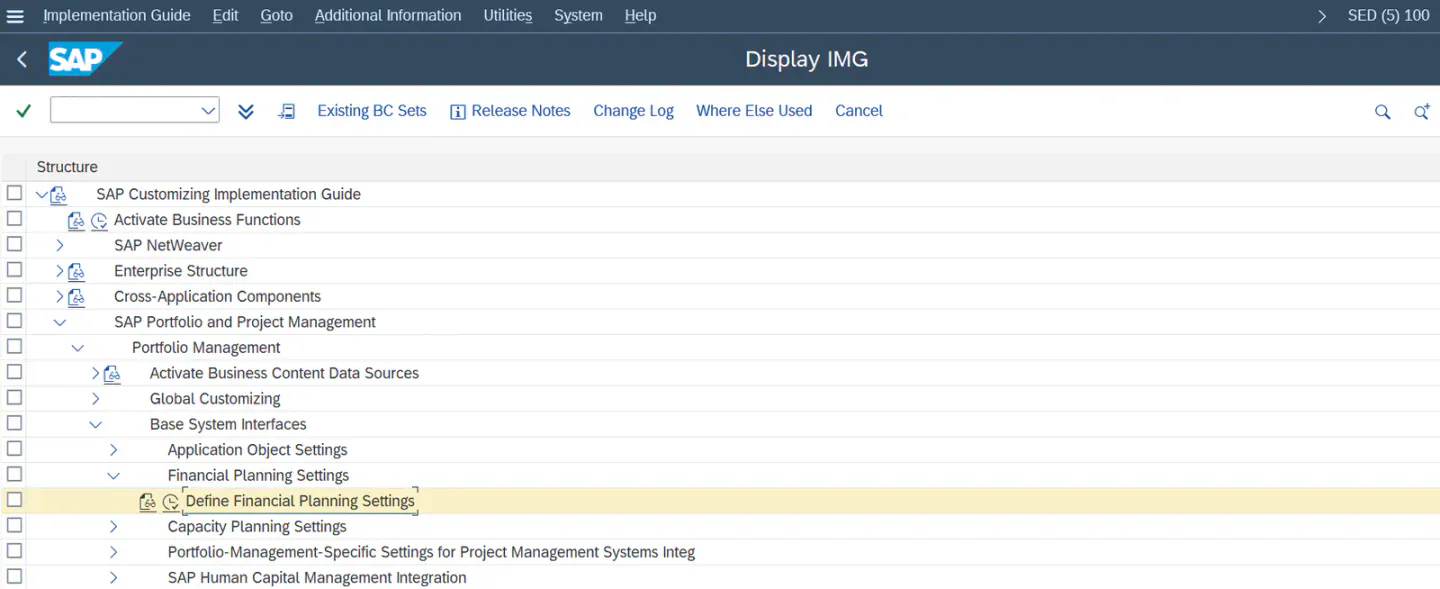
- Before posting, identify the cost element (G/L account) you will post to. You can find it via the SPRO path shown below.
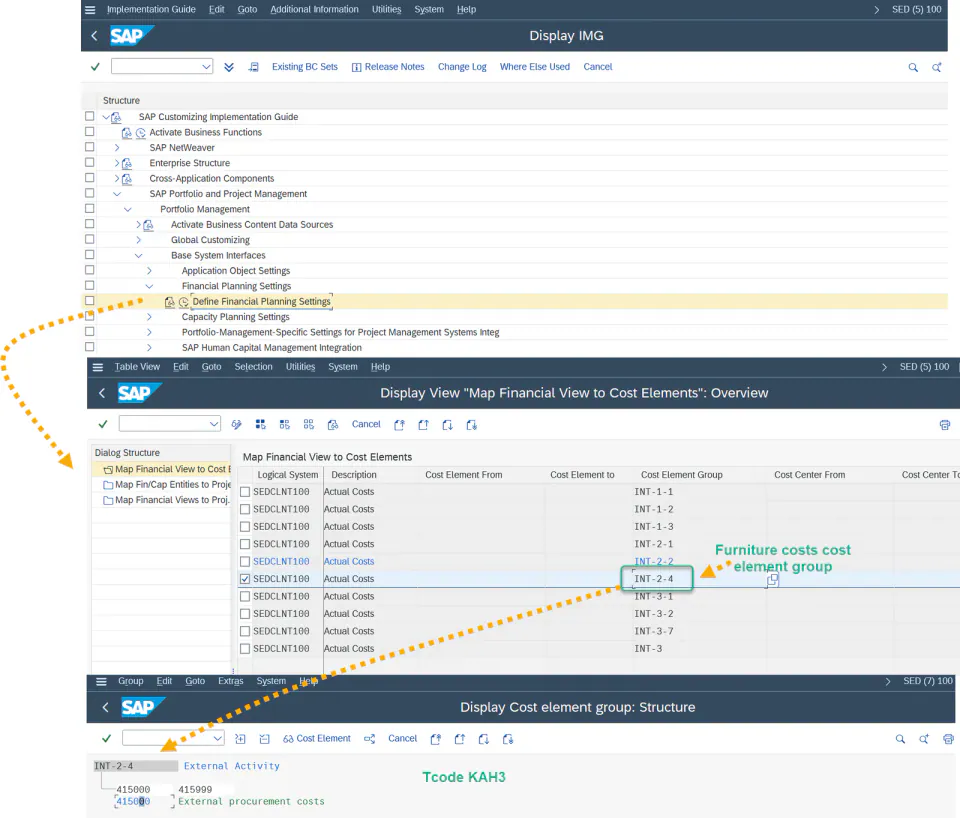
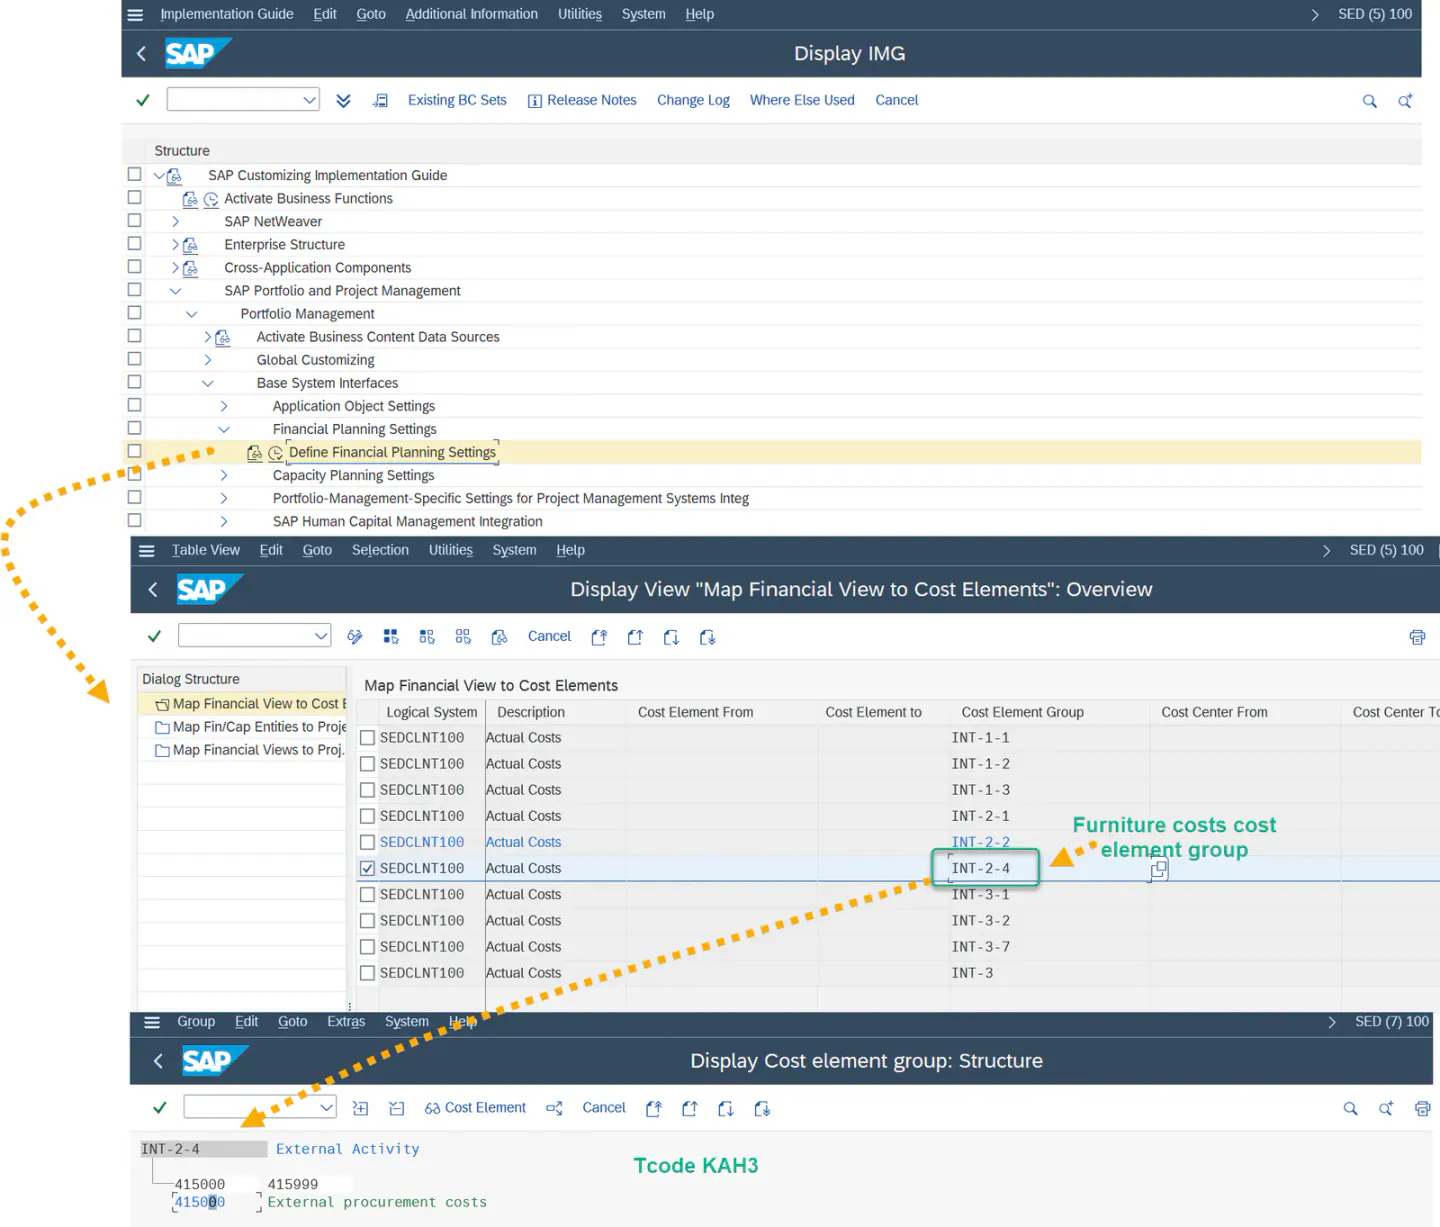
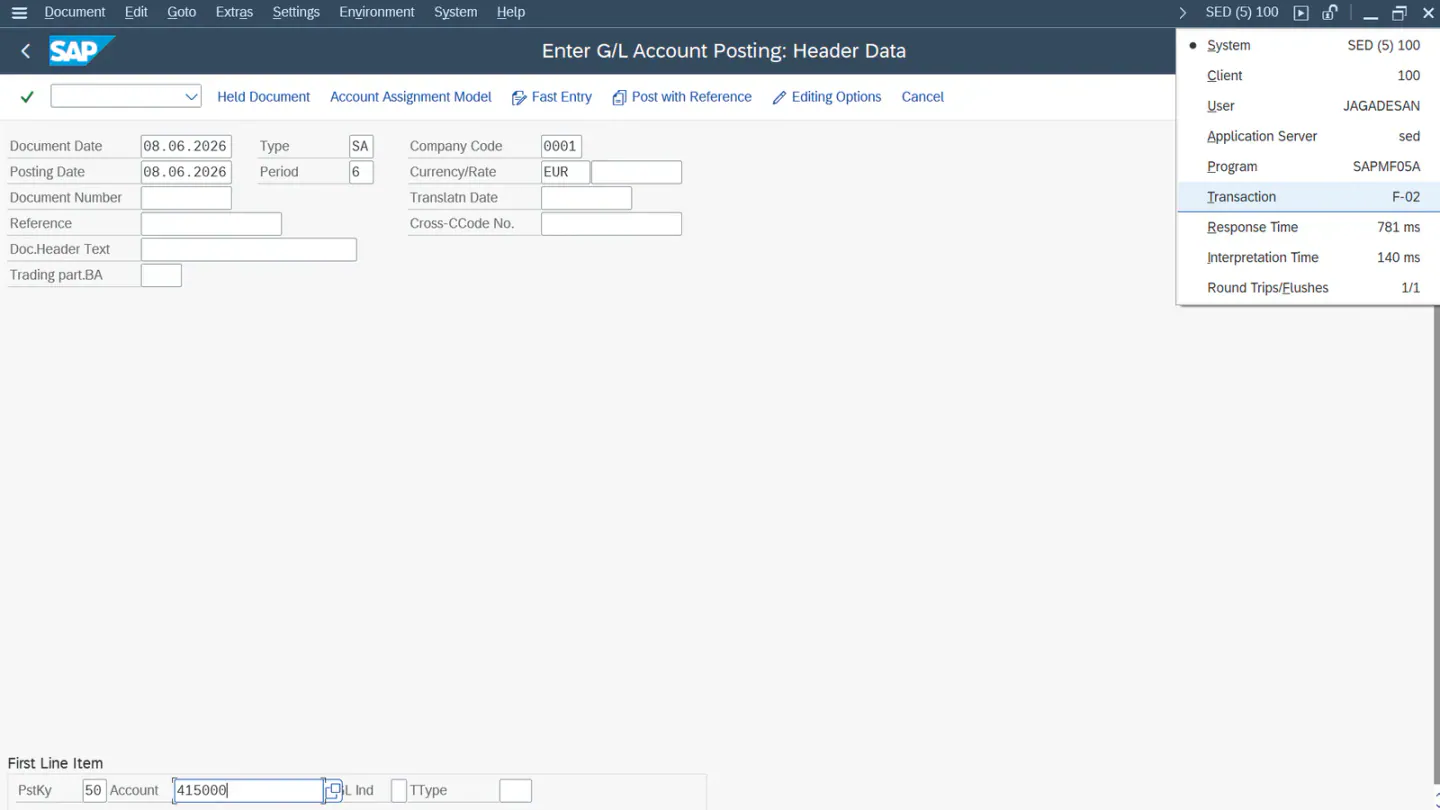
- This G/L account (for example, 415000 above) is the source account where the amount is debited. You therefore post a credit entry (posting key 50 — money leaving the account) against this G/L account. A second account is required for the offsetting debit entry (posting key 40 — money entering the account); here, a new G/L account 600000 called “project expenses” was created. The debit and credit amounts must be equal so that the document balances to zero. To post the actuals, use transaction
F-02.
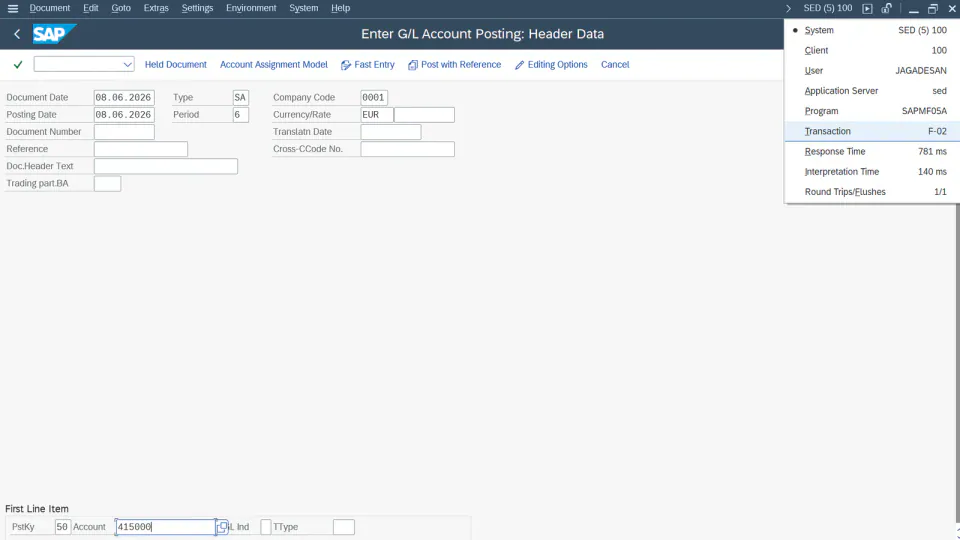
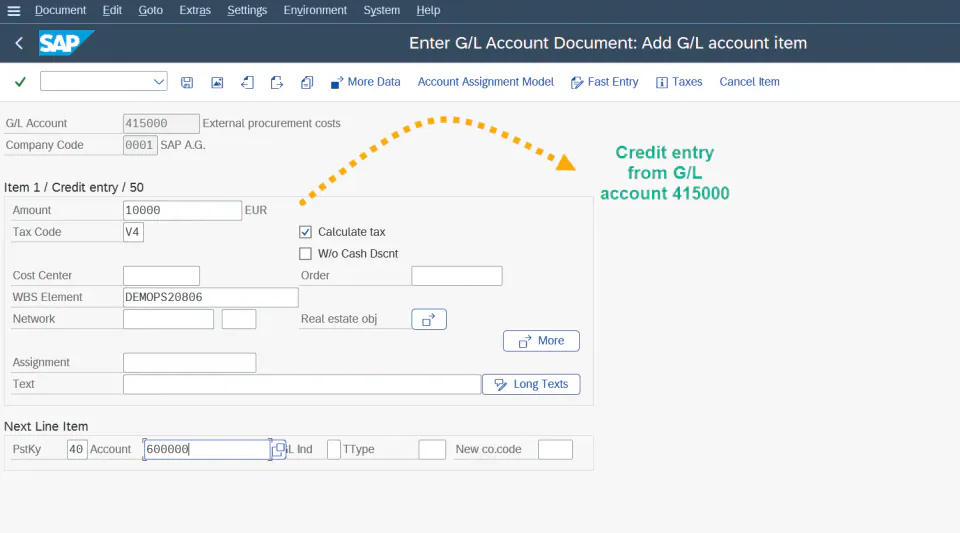
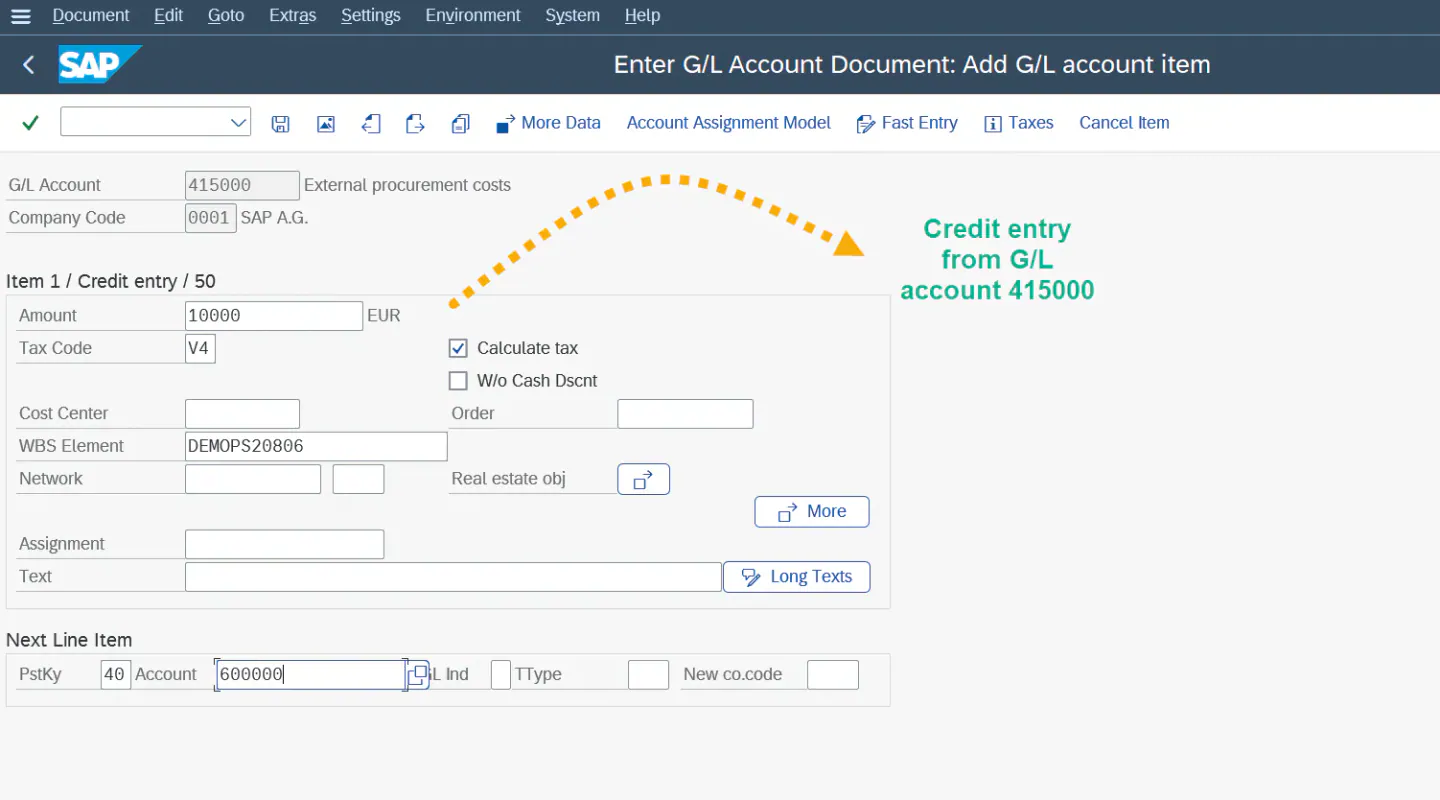
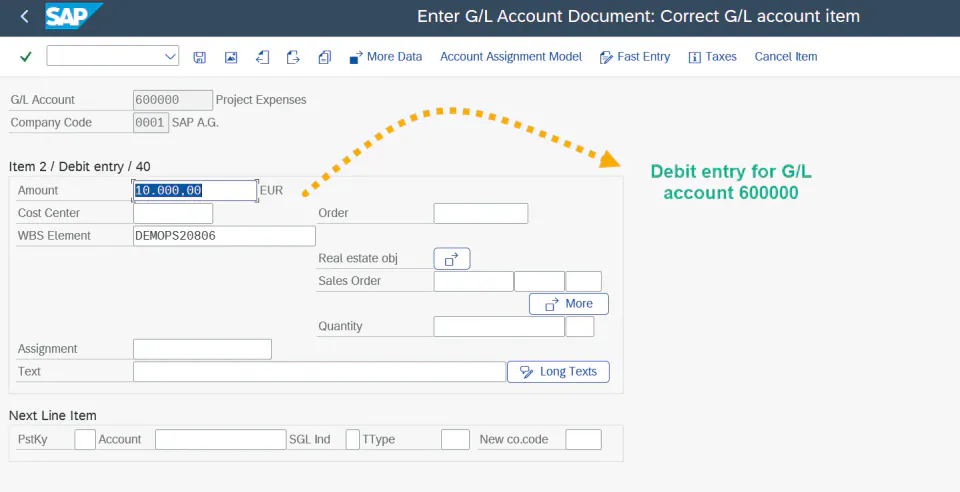
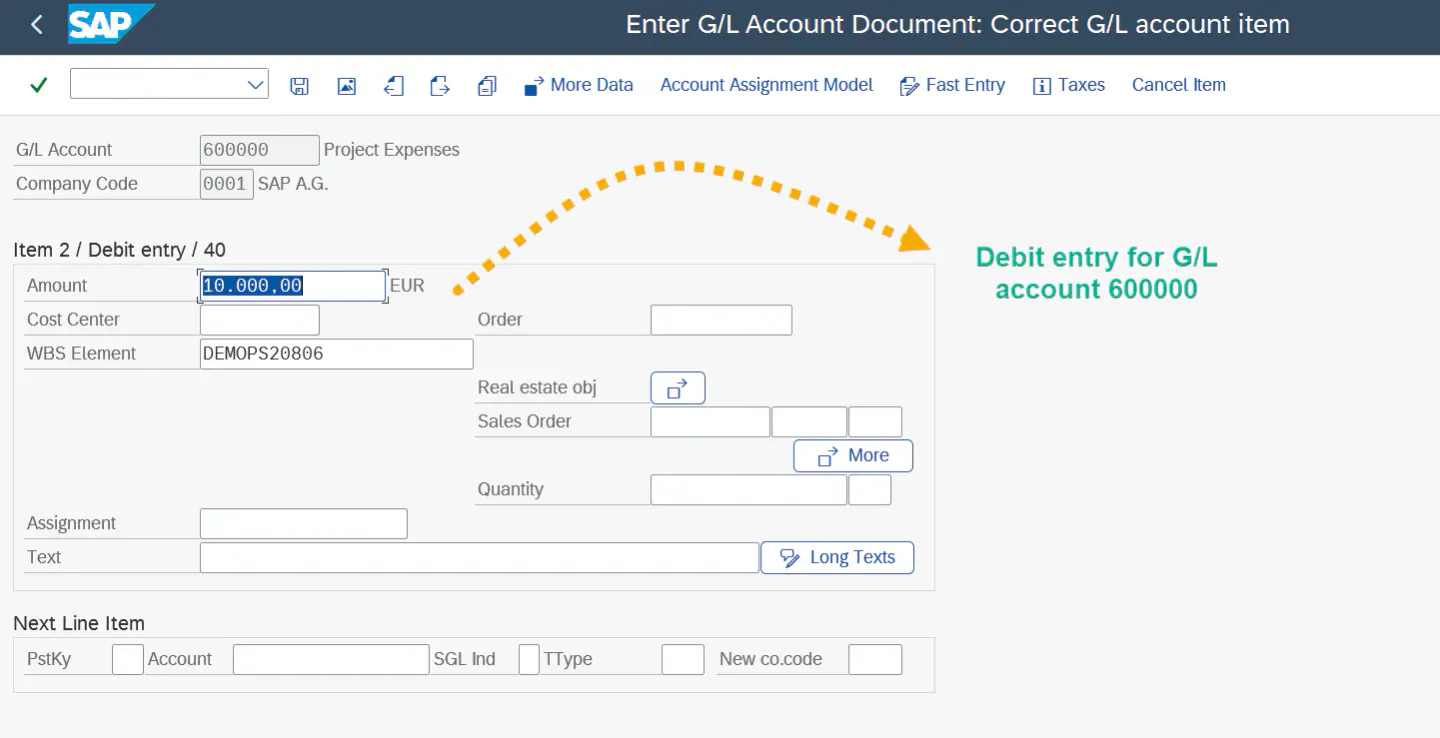
- After entering the credit and debit line items, choose Save. The document is then posted successfully.
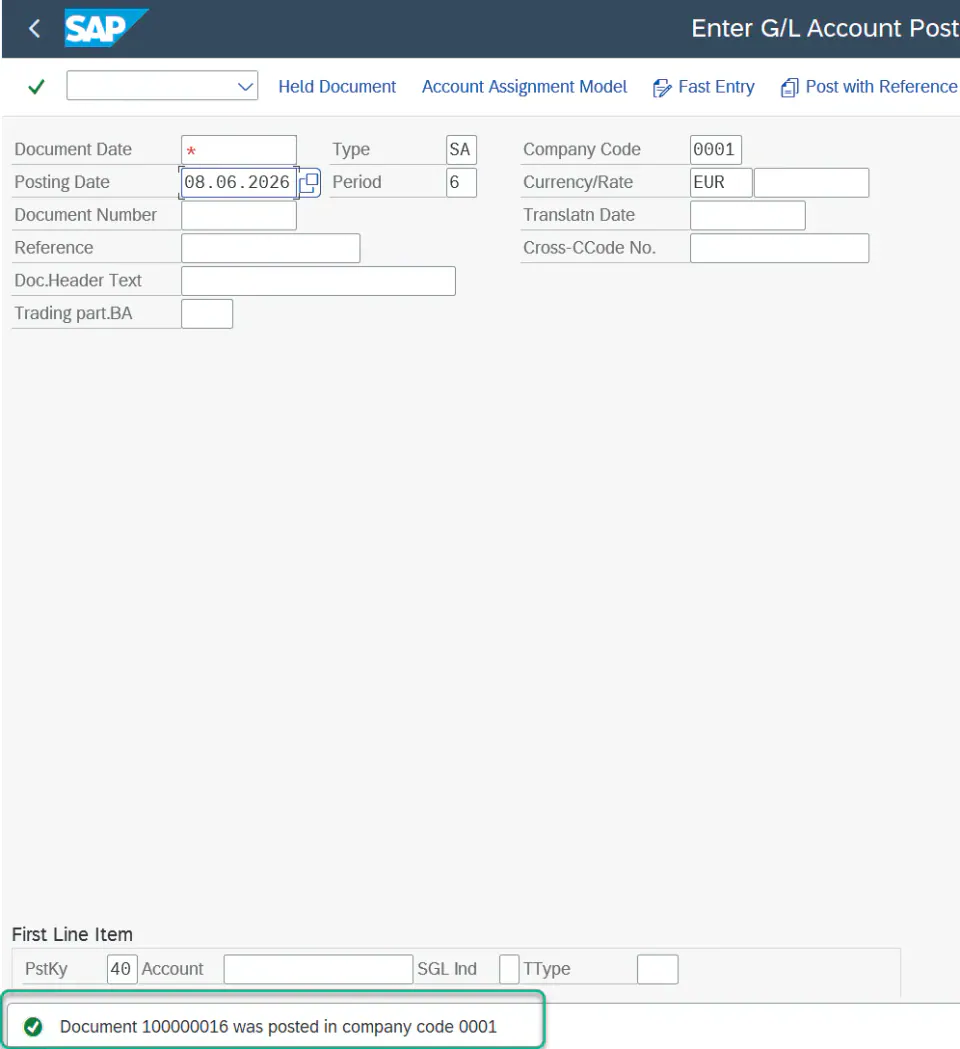
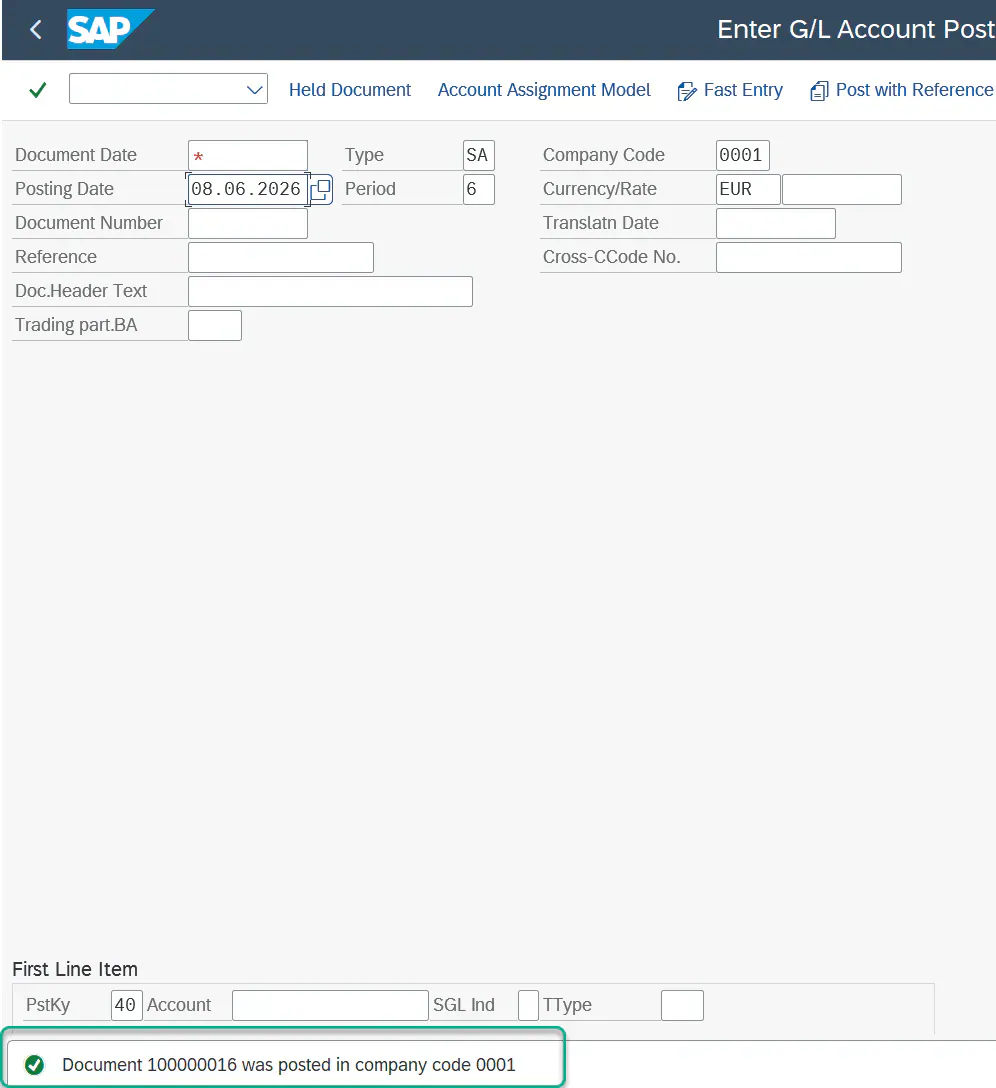
- Once posting is successful, run the report
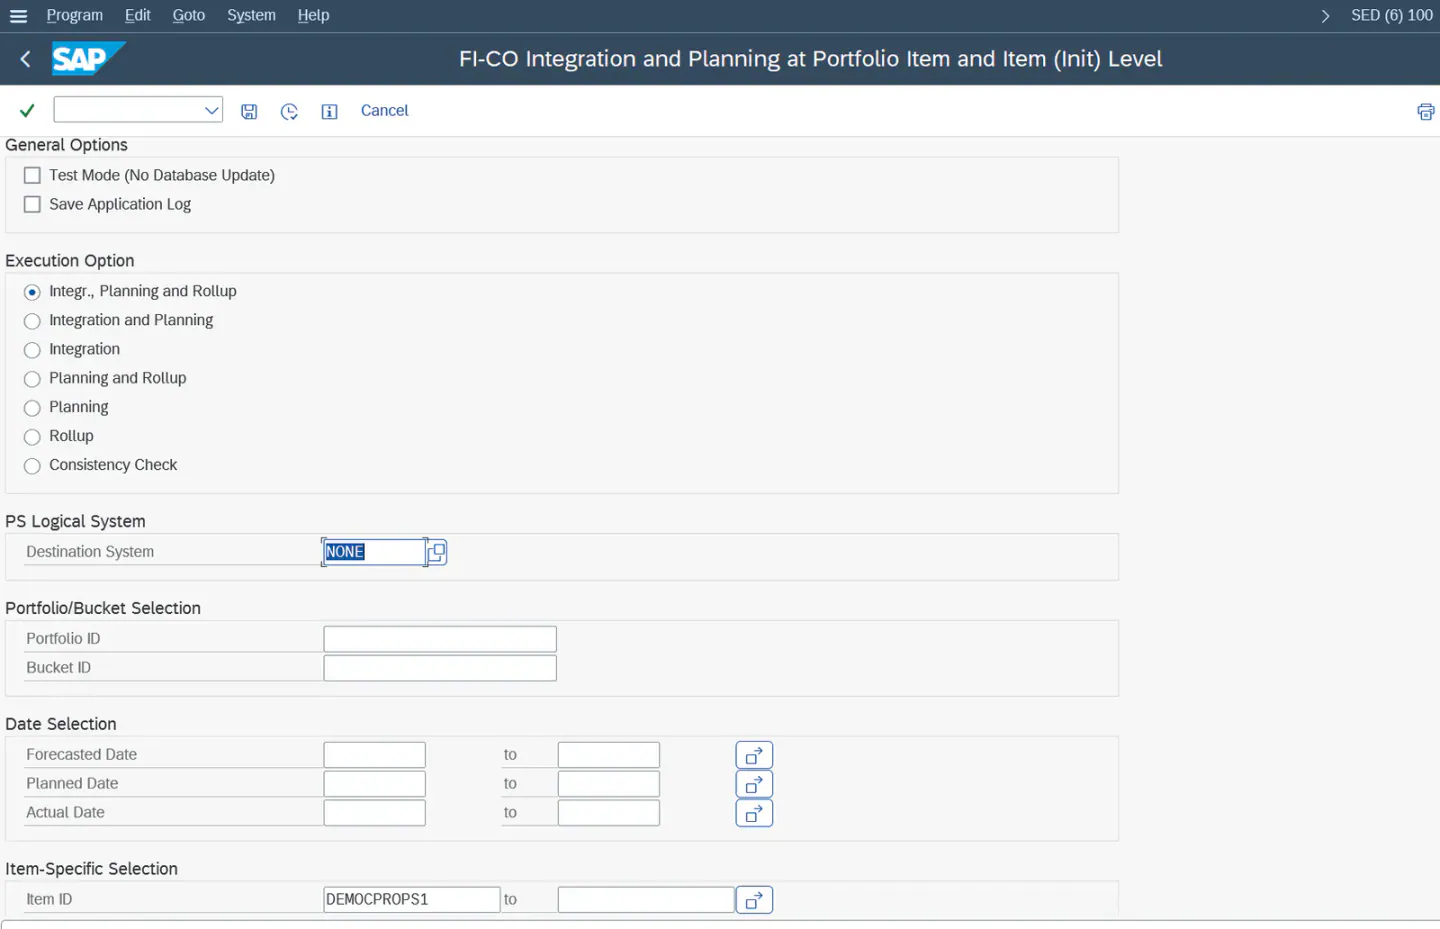
/RPM/FICO_INT_PLANNINGwith the inputs below to reflect the amount in the item.
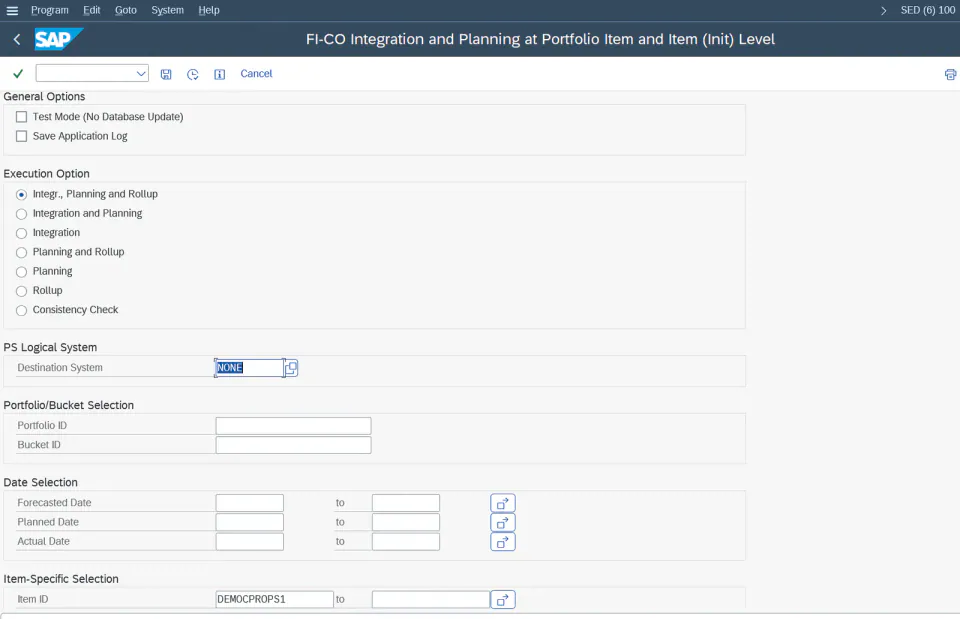
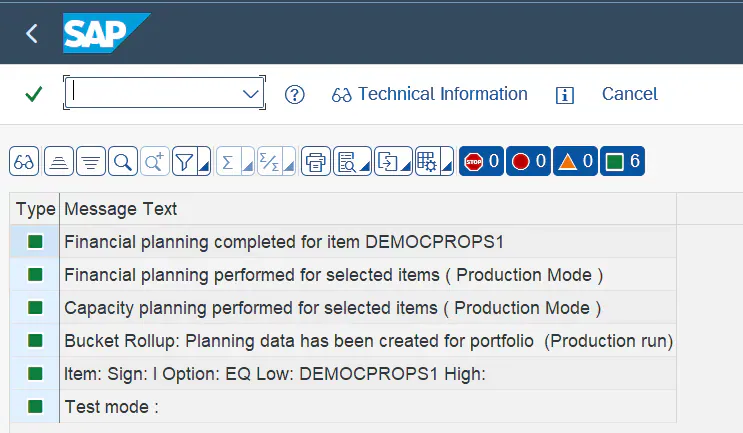
- Open the RPM item and check the financial planning. The actual amount is posted against the Furniture cost element (G/L account 415000).